
Designing your home recording studio to get the sound you like so you can enjoy rich sound recordings doesn’t have to be complicated. With the best acoustic foam panels, you can reduce echo and reverb while significantly improving sound quality during your recording sessions.
But buyer beware — not all acoustic foam tiles are created equal. And finding the best sound treatment panels when there are thousands of options to choose from can be overwhelming.
There are many different factors you have to consider when choosing foam tiles, including their thickness/density, their size, the quality of the foam they’re made from, and even their aesthetic.
In this post, I’ve reviewed and ranked the best sound treatment materials you can use to make your home studio a wonderful audio recording environment.
These picks are based on years of personal experience as well as closely analyzing user reviews and feedback from other industry experts.
I’ve also included tons of details about what to look for when choosing acoustical foam panels and studio wall foam, how to use them properly for effective sound absorbing and acoustic treatment of your space, and other valuable tips to help you get your studio set up just the way you want for superior sound quality.
This guide has been fully updated for 2023 to include the latest products currently on the market, so you can find the best acoustic foam panels for your needs.
Disclosure: Some of the links in this article are affiliate links, meaning at no additional cost for you, we might get a commission if you click the link and purchase.
What are the Best Acoustic Foam Panels?
Here are my picks for the 6 best acoustic foam tiles for your studio in 2023:
1. Pro Studio Acoustics Wedge Foam →
 Pro Studio Acoustics - Blue/Charcoal - 12"x12"x2" Acoustic Wedge Foam Absorption Soundproofing Tiles - 12 Pack
Top Features:
- 12 inches square
- 2 inches thick
- 2 colors of blue and charcoal
- 12-pack with six of each color
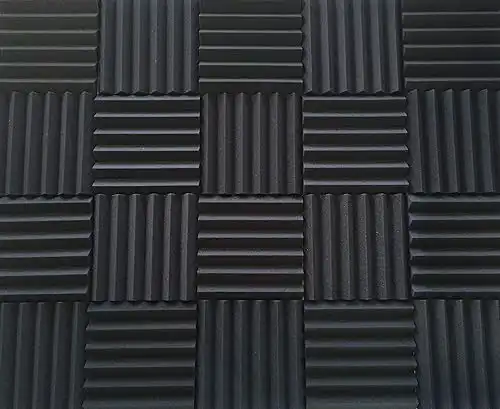
- Attractive checkerboard pattern with strong sound absorption
The Pro Studios Acoustics Wedge Foam is My Top Pick because it comes in a 12-pack with six panels in blue and six panels in black that you can mix and match in your studio.
At two-inches thick, these acoustic foam tiles provide the strong soundproofing that most studios need. Thanks to the low price, you can easily get as many as you need for spot treating sound all around your studio space.
The recommended design of these sound absorption tiles is to use them in an alternating pattern of color and alignment. This creates an attractive checkerboard pattern with strong sound absorption.
It’s worth noting these tiles don’t have adhesive on the back of them. The company says, “For permanent installations, we recommend using spray adhesive. If you are concerned about being able to remove the tiles at a later date without causing damage to the walls, we recommend using either t-pins or 3M Command strips for installation.”
Characteristics
- Two colors: blue and charcoal
- The tiles are 12 inches square and two inches thick.
- They come in a 12-pack with six of each color.
What’s special about these acoustic foam tiles?
- These soundproof panels reduce standing sound waves and flutter echoes in home studios.
- This product is “Made in the USA.” It comes uncompressed in a box, so there is no warping or waiting days for expansion from compressed vacuum packaging.
- Thanks to the thick design, the foam distorts all types of noises and does a great job with sound absorbing.
Best for: covering a full wall or they can be useful for spot acoustic treatments in the audio environment.
Click here to shop this product on Amazon.
2. SoundAssured Acoustic Studio Foam →
 Soundproofing Acoustic Studio Foam - Wedge Style Acoustic Foam Panels 12"x12"x2" Tiles - 4 Pack - DIY
Top Features:
- Available in multiple colors
- Easy to install
- Comes in a package of four (4) 1' squares of 2" thick professional acoustic foam
- Discounts available for ordering multiple bundles
These acoustical foam panels have a wedge style to create more surface area for sound absorption. The result is less echo and reverberations in your studio for improved recording and playback quality.
Characteristics
- This studio foam comes in a four-pack, with over a dozen attractive colors to choose from.
- The dimensions are 12 inches by 12 inches square by two inches thick.
- Fire-retardant with a rating of ASTM E 84.
What’s special about this studio wall foam?
- It is easy to calculate how many packages you need to cover your home recording studio walls. Just measure the square footage of the wall space and then divide by four, since each package covers four square feet.
- This studio wall foam is very easy to install. You can trim them as needed with regular scissors. Installation can be permanent by using adhesive tape or spray (sold separately) or you can use push pins or Velcro to hang them temporarily.
- This product does a great job with sound absorbing for mid to high frequencies.
Best for: moderating sound deadening and it is useful to control or remove echoes.
In this video, Josh the MusicTechHelpGuy discusses the installation of these acoustic foam tiles in his home studio. They also come in one-inch, two-inch, three-inch, and four-inch-thick versions for different applications. The thinner tiles absorb high frequencies better. The thicker tiles absorb low-end frequencies better.
The takeaway from this video is how to use these tiles to get rid of room echo and reverb. A good tip is to make sure to cover the corners in the room because those wall angles are a source of undesirable flutter echo.
Click here to shop this product on Amazon.
3. IZO Acoustic Egg-Crate Tiles →
 6 Pack Egg Crate Foam Cushion 2" Thick Acoustic Panels Sound Proof Foam Padding
Top Features:
- 12" x 12" size
- 2" thick for improved sound absorption
- Great for acoustically treating walls and ceilings for a variety of purposes
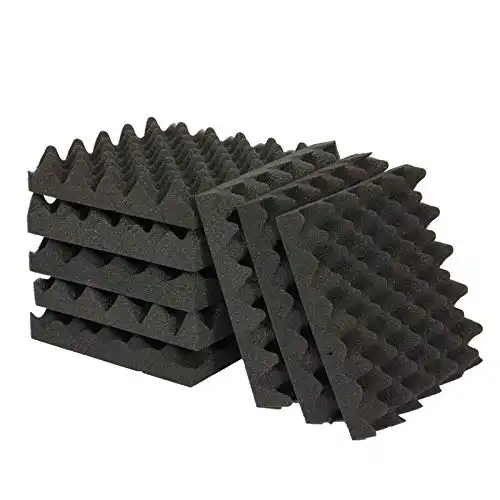
These sound treatment tiles have an egg crate design that absorbs sounds to prevent noises from leaving the studio. Use them on your studio walls or ceilings to improve sound clarity.
Characteristics
- Two inches thick, when measured from the peak of the tip of the foam to the base.
- Variety of sizes of 12 inches to 36 inches.
- One color of charcoal gray.
What’s special about them?
- The egg-crate design is very efficient for sound absorption.
- You can easily attach the foam tiles to your walls or ceiling
- The two-inch thickness reduces reverb and reflections, especially in the mid- to high-frequency range.
Best for: covering the ceiling, especially if it is not parallel to the floor because of the angular reflection of sound that will be bouncing back from the ceiling to walls. The lightweight nature of soundproofing foam makes it easy to apply acoustic tiles to the ceiling or any other surface.
This video is by Caleb from DSLR Video Shooter focuses on improving a home recording studio to improve the sound quality for video recording. There is an explanation of the difference between soundproofing and sound treatment, sound deadening tips, how sound travels/sound energy insights, and how sound is picked up by a microphone.
The takeaway from this video is that for the typical home studio, 100% soundproofing is not usually feasible due to the complexities and the cost. However, sound treatment is easy to accomplish and not very expensive, especially with quality, affordable acoustic foam panels like these. Sound treatment does not result in much soundproofing; however, it can significantly improve the quality of the recorded sound.
Click here to shop this product on Amazon.
4. JBER Pyramid Acoustic Foam Panels →
 JBER Acoustic Sound Foam Panels, 24 Pack 2" X 12" X 12" Charcoal Soundproofing Treatment Studio Wall Padding Sound Absorbing Fireproof Pyramid
Top Features:
- Comes in a 24 pack to save money and increase coverage of your space
- Great for spot treating studios, rehearsal spaces, and other areas
- Each package covers 24 sq. ft.
You can hear the difference when using this pyramid foam properly as a sound treatment. You will be amazed by how much sound improvement is possible with just a few of these acoustic sound panels strategically placed in your studio. They can do a great job to eliminated unwanted noise.
Characteristics
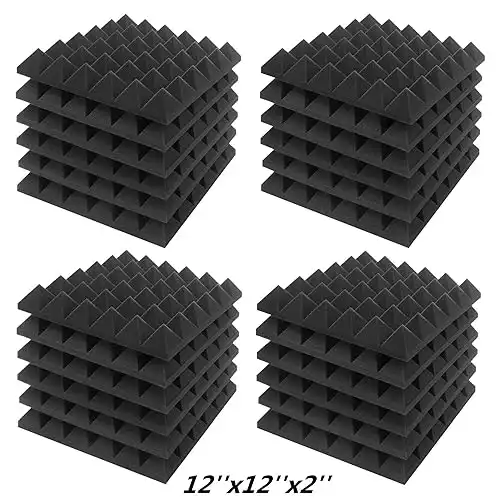
- These foam panels are two-inches thick and have a pyramid-cone shape.
- They come in a 24-pack in three colors of charcoal, blue, and red.
- They are 12 inches square.
- They add modest soundproofing to reduce outside noises.
- They ship compressed.
What’s special about this studio wall foam?
- You can choose between six-pack and 24-pack options based on the size of your studio.
- They reduce both echos and background noises.
- You can cut and shape the sound dampening panels without affecting their noise reduction.
- Great for acoustic treatment in a home studio.
Best for: home studios to help reduce reverb, flutter echo, and unwanted reflections. Use them to cover a wall or for spot sound treatment of special areas.
This video by EXOcontrato shows how to use acoustic sound panels with the technique of spot treatment. Spot treatment is using the acoustic panel to block reflection and modify the sound patterns in a room. To use this technique he uses a mirror to determine where the wall will reflect sound toward where the listener will be sitting.
The takeaway from this video is, you can use acoustic sound panels to fine-tune a recording studio or home entertainment room without fully covering all the walls.
Click here to shop this product on Amazon.
5. Mybecca Hexagon Acoustic Panels →
 Mybecca 6 Pack Hexagon Acoustic Foam Panels
Top Features:
- Unique hexagonal design - 12" x 12" x 2"
- Affordable choice for soundproofing rooms of all sizes
- Great for studios, vocal booths, and control rooms
- Reduces noise, reverbn and flutter echoes
These acoustic panels are a hexagon-style that can be used to dampen sound and improve clarity in your studio environment.
Characteristics
- They are 12″ x 12″ x 2″.
- They are very affordable and cost-efficient.
- Unique hexagonal design makes them stylish as well as effective.
What’s special about them?
- Like all quality acoustic panels, they eliminate standing waves, reduce undesired sound reflection, and help reduce outside noise and other unwanted noise.
- Examine all the hard surfaces in a room. Those will reflect sound. The echoes will cause recordings, especially of voice-overs, to sound strange and somewhat hollow. Covering reflective surfaces with these panels will reduce or eliminate these problems.
- The panels reduce between 80 and 90% of typical background noises and sounds.
- They are compliant with all flammability standards.
- You can use the panels in small and large spaces.
Best for control rooms, recording studios, and vocal booths.
The product manufacturer, Mybecca, produced this video to show how easy it is to install their acoustic tiles using spray glue. While this video is for their wedge panels, the same applies to their hexagon studio wall foam panels. Be aware that if you do not own the home, you may have to return the place to its original condition when moving out. For a rented home, consider mounting these acoustic tiles on cardboard and then hang the cardboard on the wall, in such a way that it does not cause any damage.
The takeaway from this video. Gluing panels on a wall is a more permanent solution. Be sure you place them properly, where you want them. Depending on the type of adhesive used, it can damage a wall or leave some residue of glue or bits of foam on the wall, when you pull the tiles off.
Click here to shop this product on Amazon.
6. TroyStudio Acoustic Studio Absorption Panels →
 TroyStudio Acoustic Studio Absorption Foam Panel - Broadband Sound Absorber
Top Features:
- 12" x 12" 2" size
- Unique groove structure design offers better sound absorption than many other panels
- Easy to cut and install
Enjoy the soundproofing and elimination of background noises that you need with these innovative acoustical foam panels featuring a groove structure for maximum sound absorption.
Characteristics
- They measure 12 inches by 12 inches by two inches thick.
- They come in a six-pack with the choice of black, blue, and purple colors.
- Special 18-pack also available for those needing more coverage.
- Excellent sound absorption qualities.
What’s special about them?
- The panels meet flammability standards and are environmentally friendly.
- They are very easy to cut and get set up in your space.
- These panels have a high NRC rating, which makes them a superb choice to cover a portion of a wall that causes unwanted sound reflections.
The NRC rating is the noise reduction coefficient. It is a single number that ranges from zero to 10. At zero NRC, there is no noise reduction and the surface is very reflective. At an NRC of 10, all sound is absorbed. At an NRC of eight, the material absorbs about 80% of the mid-frequency sound. Any NRC around eight is excellent.
Best for: spot treating areas where you need a little more soundproofing and acoustic treatment.
Click here to shop this product on Amazon.
The Benefits of Using Acoustic Panels in Your Studio
Foam acoustic panels offer a myriad of benefits that make them an indispensable addition to any home recording studio.
One of the most significant advantages is their ability to improve sound quality by effectively absorbing and dampening unwanted echoes, reverberations, and reflections within the room. When recording audio, these acoustic issues can negatively impact the final product, introducing unwanted noise and muddiness. By strategically placing foam acoustic panels on walls, ceilings, and even doors, the studio’s acoustics can be optimized, resulting in a cleaner, more professional sound.
Moreover, acoustic panels are relatively easy to install and can be customized to fit the specific needs of the recording space. They come in various sizes, shapes, and thicknesses, allowing users to tailor their placement to target problem areas and create a well-balanced acoustic environment. This flexibility also means that studios with limited space can still benefit from their sound-enhancing properties without significant alterations to the room’s layout.
Another advantage of using acoustic panels is their cost-effectiveness. Compared to other soundproofing materials, acoustic foam is generally more affordable and readily available, making it a practical choice for those on a budget or looking for a quick and straightforward solution. Additionally, their lightweight nature means they can be easily removed and relocated if necessary, making them ideal for those who may move or change their studio setup in the future.
On top of all that, the improved sound quality achieved with foam acoustic panels reduces the need for extensive post-production editing and noise reduction, saving both time and effort during the recording process. Artists and content creators can focus more on their creative endeavors and less on dealing with audio imperfections, leading to a more enjoyable and efficient recording experience.
Guide to Choosing & Using Acoustic Foam Panels
Here is a guide about important topics to understand and consider for the sound treatment and sound dampening of your home recording studio with studio wall foam.
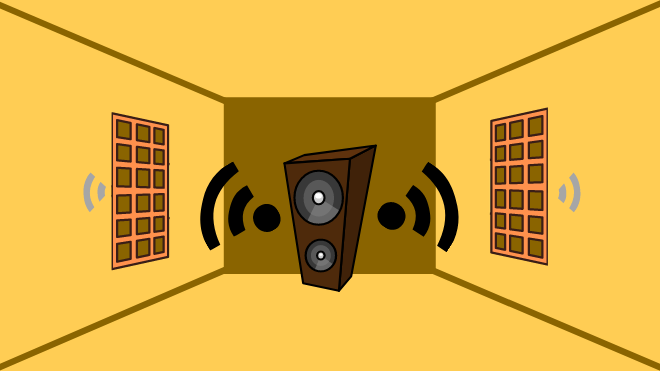
Sound Treatment is Not Soundproofing
Sound treatment is different from soundproofing.
The goal of soundproofing is to block sound transmission from one place to another one.
“Sound isolation is about isolating the sound between inside and outside. You may want a quiet place, without the sound of outside cars. Or you may want to have a room with loud music but without interfering with your neighbors,” explained Nuno Fonseca, CEO of audio software company Sound Particles.
I giggle at the silliness when I read complaints that people try to block sound of a neighbor’s dog barking by putting these acoustic panels to hang in front of their windows. That will not work at all.
Soundproofing and blocking sound is a reconstruction project because soundproof foam does not exist.
Soundproofing is a completely different endeavor. It is much more expensive and requires substantial changes in the room design including renovation and major construction. You need very thick, heavily insulated, concrete walls to achieve 100% soundproofing. There is no comparison with hanging a few foam acoustic panels on the walls.
“[Sound] isolation is like a chain that breaks but its weakest link. I can place a fantastic isolation material everywhere, but if I have a door or a window that doesn’t isolate much, all the remaining isolation will not do much,” Fonseca told us.
If your goal is complete soundproofing and completely stopping a sound wave from leaving a room, this guide is not going to help you.

You need to learn more about blocking sound compared to absorbing sound. Soundproofing is blocking sound and that means completely stopping vibrations, not changing the quality of the sound by absorbing a part of it.
Acoustic panels are for the sound treatment of a room to stop sound from bouncing around the room in ways that reduce the quality (not the volume) of the sound.
Think of these as fine-tuning the room to keep reflected sound from bouncing off hard surfaces and coming to your ears more than once in distorted ways that make it sound bad.
Sound treatment is the fine-tuning of your home studio to make the room sound cleaner and clearer, and it’s not something you can ignore.
“Acoustic treatment is focused on making sure that the sound that is produced inside the room is listened to in the best perfect way (also inside the room),” Fonseca said. “For instance, if the room is too reflective, it will have too much reverb. If the room is a material that is too reflective on some frequency ranges, the equalization of the arriving sound will be off. If the room has some flutter echos, the sound will be terrible.”
In an interview with Reverb.com, famed producer John Cuniberti explained that a huge mistake people make when setting up their studio is “they don’t spend enough time, energy, and money on the acoustics, and they spend too much money on the bright, shiny things…One of the problems is once you start building a studio, it’s tough to undo it, and you are usually stuck with the results. I would suggest going slow. Hang some acoustic panels in the obvious places and then do some recording and mixing
As the voice actor Michael Schwalbe said, “The most important element is an acoustically-treated space to record in. Ideally, this is something like a walk-in closet with lots of clothes or pillows to absorb sound, but you can use acoustic foam or comforters too.”
How to Choose Acoustic Foam Panels

The considerations for the acoustic foam tiles include a choice of sound absorption, thickness, size, and design.
To get better quality acoustic panels, look for a high number (in the range of one to 10) for the noise reduction coefficient (NRC) for better sound absorption. The recommended NRC for a home studio is around eight.
Be aware that the NRC is only a measurement of the absorption of the mid-range sound. If you are having trouble with the bass sound in your home recording studio this NRC number is meaningless for bass frequencies because it does not measure them.

The recommended thickness is two inches. Denser foam weighs more.
You can tell if the product is of better quality, with denser foam, by comparing the product’s weight (not including the shipping packaging weight) with another product that covers the same amount of square feet.
The design style of the foam is a matter of personal choice. If they are the same quality, there is not much of a difference between panels that are wedge style, pyramid style, or egg crate style.
The only difference in style that makes a significant difference is a panel designed for capturing low frequencies. Accomplish this by using another product designed specifically to absorb bass frequencies. These specialized “bass traps” install in the corners of the room and the ceiling corners, where bass sound tends to collect. They are thicker, have more angles, and fit in a corner well.
How many acoustic panels do you need?

Use this handy acoustic panel room calculator to enter the length, width, and height (in feet) of your home recording studio to get the number of recommended panels.
Please note that in most home recording studios you do not want 100% coverage. You will get better sounding results with a sound treatment that provides 60 to 80% coverage.
The results given by the calculator include a light treatment recommendation for living rooms, conference rooms, or workout rooms. It gives a recommended treatment for most sound rooms, which is good for home studios. It also gives a recommendation for heavy sound treatment for professional recording studios. This calculator tells you the number of panels needed for three sizes of panels that are two-feet square, two by three feet, and two by four feet.
How to Choose Correct Panels Positioning

There are two ways to choose the positioning of acoustic panels for a home studio.
The basic way is to use a mirror to imagine the direction of the sound reflections. Doing this mirror technique with the help of a friend makes it easier.
The other way is to use a professional audio testing system that shoots sharp sounds out of a handheld transmitting device while recording the sound as it bounces from the room surfaces. Then, the software makes some calculations and presents a wave pattern of the sound, used by a professional audio technician to make room adjustments.
You can see this audio testing equipment used in the tutorial video above – How to Set Up, Test and Improve Your Home Music Production Studio Room. In this video, the instructor converts a regular bedroom in a house into a home recording studio from scratch. The same applies to creating a studio for your podcast (more info on creating a podcast at home in this guide by Porch.com).
For the vast majority of home recording studios, the mirror technique is the most appropriate. Invite a friend to help you.
Sit in your desk chair in front of your sound mixing table.
Make sure to center the table and check if it is equidistant from both walls.
Make sure your monitor speakers are at the proper height, which is at eye-level from the center point between the tweeters (high-end speakers) and the bigger mid-range speakers below them. Both speakers are together in the speaker monitor cabinets placed on your studio desk or stands.
Once you have the correct position for yourself, ask your friend to carry a mirror around the room to hold up to the walls. Have your friend stop frequently for you to look for the reflection of the monitor speakers in the mirror. When you see the reflection of your monitors, have your friend mark those spots on the walls. That is where sound will reflect from the sound coming out of your monitors.
If you use acoustic panels to cover a large portion of these reflective areas, you will deaden the reflections and improve the sound in the room. These are the “first reflections” of the sound. You do not have to cover the walls from floor to ceiling for effective sound dampening. Just cover a wide area of the wall about two feet up from the floor to about two feet above the height of your head when you are sitting down at your mixing desk.
Here is a video showing how to use the mirror technique for the placement of acoustic panels.
Sound Treatment of Corners and Ceilings
If you want the best sound, any corners in the room are going to need sound treatment.
Sound waves move quickly — at 1,086.9 feet per second to be precise.
And when those fast-moving sound waves hit a corner or ceiling in your recording space, they’ll bounce and forth at breakneck speeds, causing flutter echoes.
Consider using bass traps in the corners because bass collects in that part of the room and causes distortions in what you hear in the low-frequency range. 
Sit at your sound mixing desk and look up.
If you see a reflective surface, then, that part of the ceiling needs covering with acoustic tiles. Cover from where the ceiling meets the wall in front of you to about six feet behind you. This will keep all the sound that heads upward from being reflecting down to your ears.
It sounds bad when reflected sound is out of sync with the sound you hear from the monitors.
How to Cut Acoustic Foam Sound Absorbing Panels
Cutting acoustic panels is easy and fun. It is like an art and crafts project.
For acoustic panels that are two-inches thick, you can cut them with a nice pair of scissors. The kind of scissors used to cut fabric.
If you want to cut thicker panels and make clean lines, consider using an electric carving knife like the kind you use to carve a turkey.
Mark the cut to make on the back of a panel and use the electric knife like you might use an electric circular saw. This is easier and makes neater cuts than trying to cut the foam panel with a utility knife.
How to Hang Acoustic Foam Panels
Here are some options to use for ways to hang the acoustic foam sound dampening panels:

3M General Purpose 45 Spray Adhesive →
This is a popular spray adhesive that can either be sprayed on the tile, the wall, or the ceiling, and then place the tile in position. It gives a secure bond in 30 seconds and dries completely within 15 minutes. It can also be sprayed on cardboard to attach tiles to a cardboard backing, and then attach the cardboard to the surface in an easily removable way.
Loctite 2235316 General Performance 100 →

This is a translucent spray that creates a strong enough adhesive hold that tiles will permanently stay in place. The tiles will still be removable, without causing damage, even if the installation is temporary or if the acoustic tiles need to be re-positioned.

These strips are 0.75 inches wide by 3.65 inches long. They are strong enough to hold acoustic tiles in place and easily remove without causing any damage. They work on most surfaces.
Tips for Getting the Most from Studio Wall Foam

Here are some tips that will help you with the sound treatment of your home recording studio.
Thickness
Thicker panels are better; however, two-inch-thick panels are is the best choice for a home recording studio. This is the most popular standard.
Size
Large panels are harder to mount and to replace with new ones. Smaller tiles are easier to mount, especially if you are working alone. The most flexible choice is to buy the 12-inch square or 24-inch square sizes of acoustic tiles.
Wall Surfaces

Here are the best things to use for different wall surfaces and textures:
- Drywall and Smooth Surfaces: Use spray adhesive, double-sided tape, adhesive squares, Gorilla® mounting tape, 3M Command Strips®, or two-inch T-shaped pushpins.
- Concrete, Brick, and Rough Surfaces: Use a construction adhesive like Liquid Nails®
- Wallpaper or Textured Surfaces: It is not recommended to install acoustic tiles on these delicate surfaces using spray adhesive. They will not adhere well and you will cause significant damage when removing the tiles.
- Uneven surfaces: Mount the acoustic foam tiles on cardboard to give them a sturdy flat surface to adhere to and then hang the cardboard on the uneven wall using any of the materials described above, depending on the type of wall surface.
This video tutorial shows the easy installation of acoustic panels using 3M Command Strips®. The panels are easy to place and to remove without damaging the walls.
The Sandwich Acoustic Panel
Making a “sandwich” of materials may help with the installation of acoustic panels, depending on the surface you are working with. The technique also makes the acoustic panels more portable if you need to remove them frequently, take them to another location, or have to be careful not to damage walls of rented spaces.
The basic sandwich is an acoustic panel mounted on cardboard using permanent spray adhesive. The advanced sandwich technique has more layers, which are, in order, these options:
- Acoustic Tile
- Permanent Spray Adhesive or Glue
- Cardboard, Corrugated Plastic Board, or Plywood
- Wall Surface
Make the acoustic tile sandwich, let it completely dry, and then attach the sandwich to the wall using push pins, small nails, tacks, or a non-permanent, easy-to-remove adhesive, such as 3M Command Strips®. If you prefer, use adhesive squares. Use at least three adhesive squares (two in corners at the top and one in the center at the bottom) for a one-square-foot acoustic panel or four adhesive squares (one in each corner), if the acoustic-panel thickness is more than two inches.
Here is a video tutorial about this technique:
FAQ
Q: Do foam panels really work?
A: For sound treatment in a studio, acoustic panels are a great, budget-friendly choice. They can help improve the overall sound quality in your space by stopping echoes and reverberations for better recordings.
Q: What is the difference between soundproofing vs. sound treatment?
A: Soundproofing is much more difficult. It blocks sound by stopping vibrations from one place to another. Sound treatment changes the sound, using acoustic panels to improve quality, but does not lower the volume.
Q: What are the common shapes (types) of sound dampening panels?
A: Acoustic panels come in three popular styles, which are wedges, pyramids, and egg crate. There are subtle differences between them; however, they all work in the same way to absorb sound and re-direct the sound waves.
Q: What is Noise Reduction Coefficient (NRC) rating?
A: The Noise Reduction Coefficient (NRC) tells how good the acoustic foam material is at absorbing mid-range frequencies. An NRC of 10 is the maximum with 100% maximum sound absorption of certain mid-range frequencies. An NRC of zero is a reflective surface that absorbs no sound. A decent NRC rating for a home recording studio is around eight. A higher NRC is better. An NRC rating is only a measurement of the mid-range frequencies. It will not help problems with bass sound frequencies.
Q: What about ceiling sound treatment?
A: The sound that hits the ceiling will bounce back down to the walls and the floor. The floor’s sound absorption improves with thick carpet and gets worse if it’s a bare wood floor. Cover the ceiling area directly above the mixing station to get a better sound.
Q: What are other ways to improve sound treatment?
A: Bass traps go along well with acoustic tiles. Lower frequencies come out of the woofers and subwoofers and move in an omnidirectional (spherical pattern) way. The bass sound collects in the corners of a room and builds up until it causes a distortion problem. This means you will not be able to hear the low-end of your sound mix correctly. The solution is a bass trap like the Acoustic Foam Bass Trap Corner Wall or the Mybecca acoustic foam bass trap. For the best results, place these bass traps in all corners of the room where the walls meet and in the spots where the wall corners meet the ceiling.
Q: Can you have too much sound treatment?
A: Yes, it is possible to have too much sound treatment in your recording space, causing the room to sound weird and unnatural and making your recordings sound off. As audio engineer Daniel Milne at TheSeasonedPodcaster.com explained, “Using too much can lead to a room not sounding ‘lively’ enough and sounding unnatural. This will mean you’ll likely be spending time adding artificial reverberation to sounds that you record in your studio.” In other words, more panels and foam pieces isn’t always better.
A Final Word on Using Acoustic Tiles
You will be amazed at the richness of the sound that is achievable for a modest investment in time and money to use acoustic tiles for the sound treatment of your home recording studio.
Combine this effort with the recommendations for voice-over equipment, microphones, and the best home studio monitors. This will make your home studio a magnificent space for voice-over recordings.
And if you’re looking to further improve the sound in your studio, consider these cheap soundproofing materials that work great side-by-side with acoustical foam times.
Have any questions about using acoustic panels in your studio or rehearsal space? Comment below and we’ll help.
Great recommendation! Thanks for sharing the ideas.
Thank you for your feedback! I really appreciate it.