As an eLearning professional with extensive experience in recording voice-overs, I’m a strong believer that you can’t overstate the critical role a vocal booth plays in producing high-quality audio content. Whether you’re a seasoned eLearning developer, an aspiring voice artist, or a podcast enthusiast, the right booth can transform your recordings, minimizing ambient noise and creating that crisp, clear sound that captivates listeners.
But here’s the thing — getting access to a great vocal booth can be a bit like finding hidden treasure.
In this article, I’m going to guide you through some of the best ways to acquire a vocal booth that suits your needs. Whether you’re dreaming of owning one for your home studio, itching to craft a DIY masterpiece, or considering the convenience of renting time at a local studio, I’ve got you covered.
1. Budget Portable Sound Booths on VocalBoothToGo.com
VocalBoothToGo.com manufactures low-cost portable sound booths that start at under $1,000. These sound booths have a metal frame support structure that is easy to assemble and disassemble. The sound booth frames are covered by a fitted acoustic blanket material. This material provides up to 80% noise reduction and an echo-free environment for recording. Outside noise is reduced by 10dB and the blanket material suppresses humming noises.
Here are two examples of low-cost portable recording booths they offer that I love.
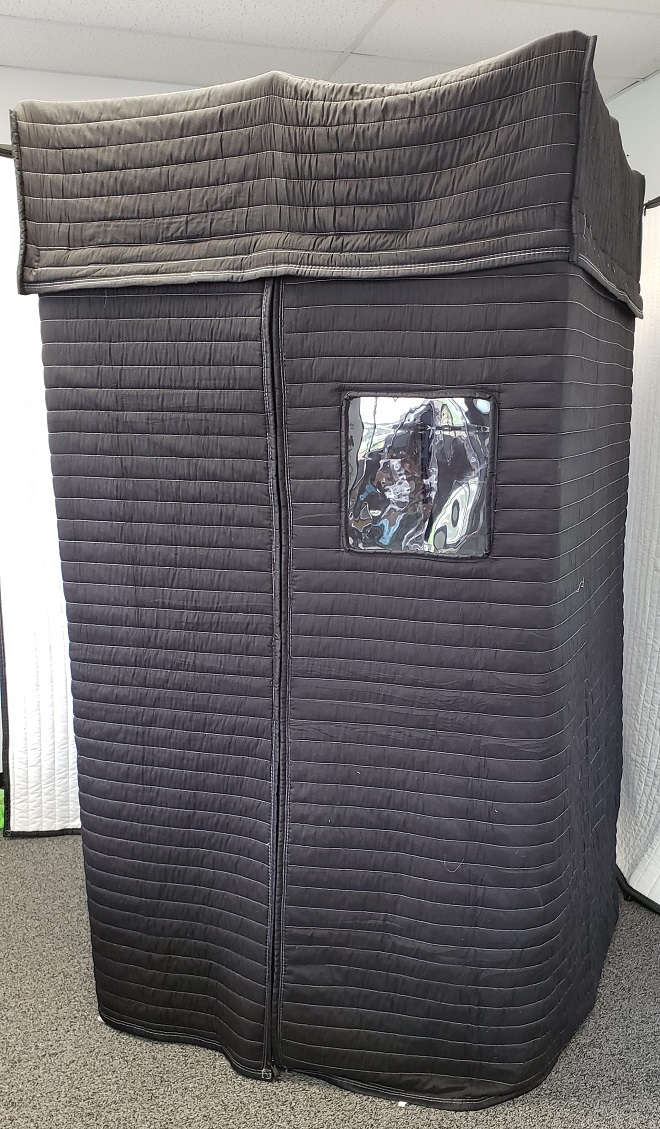
The Acoustic Vocal Booth 4 (AVB4) is a one-person walk-in booth, with these features:
- Inexpensive: Sells for $1,298.78 (price as of September 2023).
- Portability: Assembles quickly in minutes without tools. Comes with a carry bag for the metal frame and a separate carry bag for the acoustic blankets.
- Sound Reduction: Creates a reverberation-free recording environment with 80% noise reduction.
- Lighting: Includes a noise-free LED light and adapter.
- Window: One clear vinyl window is installed in the door wall.
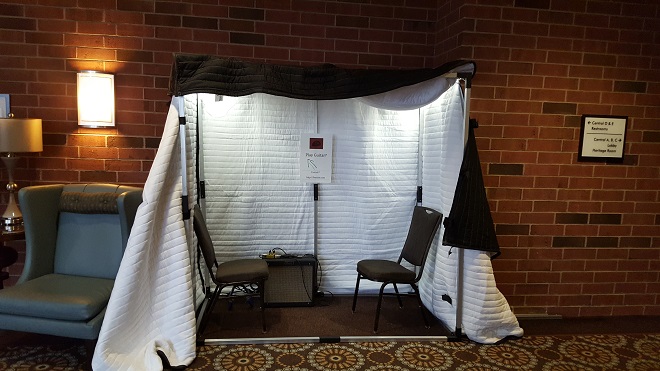
The Acoustic Vocal Booth (AVB63) is a two-person walk-in booth, with these features:
- Modestly-Priced: Sells for $1,188.68 (price as of September 2023).
- Spacious: Designed for two people with the dimensions of 80 inches long, 40 inches wide, and 80 inches tall.
- Lightweight: Easy to carry in the trunk of a regular-sized automobile or to ship by common carrier. The total weight is 100 lbs.
- Lighting: Includes two noise-free LED lights and adapters.
- Windows: Two clear vinyl windows are installed in the door walls.
Best For: These vocal booths are made for those who need portability to do their work. These portable sound booths are frequently used at conventions to record real-time announcements. They have been used to create isolation rooms for virtual reality games at gaming conventions. They can be easily set up and taken down for use to record in any office space.
2. Premium Sound Booths on VocalBooth.com
VocalBooth.com manufactures a portable professional sound room that starts at $3,750 with the standard features package, with delivery in the U.S. by standard freight included (price as of September 2023). This silver series vocal booth is a single-wall design that is commonly used for extra sound isolation, such as when recording a singer, within a larger recording studio environment. It can also be used as a stand-alone booth for voice-over recordings.

The standard package features include:
- Studio Foam Sound Insulation: The inside walls are covered with two-inch pyramid studio foam that is charcoal-colored and A-level fire-rated.
- Ventilation: Comes with active ventilation that uses a high-capacity, silent-running fan that can be left on when recording. Adaptors are available to connect this booth to a recording studio’s HVAC system.
- Cable Ports: The walls have cable and electric pass-through ports.
- Lighting: Comes with three, silent, lighting fixtures
- Finish: The exterior of the booth is finished in an executive gray color.
Best For: This sound booth is more solid than a blanket booth. Even though it can be moved around on its optional caster wheels, it is more of a permanent sound booth not meant to be taken apart once it is assembled. The built-in ventilation system is innovative and works well.
3. Buy a New or Used Sound Booth on eBay
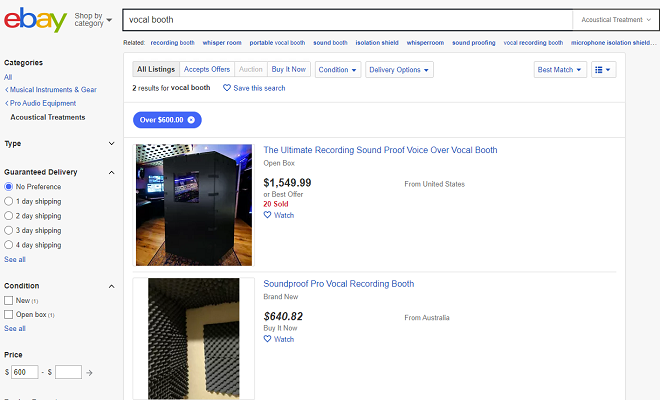
On eBay you can find plenty of choices of new and used sound booths. They range in price from just under $200 to the top-of-the-line double-walled professional WhisperRoom brand at almost $6,000.
The cheapest vocal booth that I found for sale on eBay was $160.00. For that price, you will get what looks like a shower stall with thick canvas curtains for the walls. The support frame is made from PVC tubing. The curtains hang down from the PVC tubing as a shower curtain would. The sound isolation is minimal but the curtain material does prevent any sound reflections coming off the interior walls of the room, which might add unwanted reverb to a voice recording.
For the top-of-the-line, I found a WhisperRoom MDL 4260 E model that was previously-owned and listed on eBay for sale at $5,890. A brand-new WhisperRoom sound booth of this same model costs $7.395. For that kind of money, you get a double-walled booth with excellent sound isolation and quiet ventilation. It is large enough to accommodate one person, with the interior dimensions of 2.5 feet by 3.5 feet and an interior height of six-foot-eight inches. This room offers supreme sound isolation, which is what you are paying for. It reduces sound at the frequency of 125 Hz by 30 dB and at the frequency of 1,000 Hz or higher by 60 dB or more.
Best For: People who know what they want, and who are looking for a bargain are likely to find one on eBay. Be sure to factor into your decision the cost of shipping the sound booth to your location and any assembly that may be required.
4. Do-It-Yourself (DIY) Sound Booth
I have to admit that I am more of the do-it-yourself (DIY) type of guy. A sound booth is the perfect DIY project because the professional rooms are very expensive. You can achieve nearly the same thing for less than one-quarter of the price if you build a sound room yourself.
I once built a very effective sound room out of materials I found for free, which worked extremely well to record punk bands in my basement. The reason I know that it worked well is that I never had the neighbors call the police due to my loud noise, even when the bands played at nearly deafening levels.
Sound isolation is not that difficult to achieve if you have plenty of space and lots of sound-deadening materials. I hung thick carpeting in the walls of my found-materials sound booth and allowed a one-inch gap between the layers. The sound would penetrate the first layer, get deadened by the carpet, and then have to travel through the air to be deadened again by another layer of hanging carpet.
I found that this worked quite well with three layers of very thick carpet. If you are going to try this be sure to use fire-retardant chemicals on all the materials that you install.
The trickier part is to put in ventilation so you can breathe in the room and the ventilation system does not transfer sound in or out of the sound booth. Sound travels by vibrating air molecules, so where the air goes, the sound can follow. Use a baffling system to let the air pass, by having it go around corners, and the sound can be caught by the baffling materials since sound waves flow in a straight line.
I found some helpful videos on YouTube that show how to construct a decent sound booth for recording voice-overs.
Here is the video that discusses the options of how to make a low-cost sound booth in a home including how to make a budget DIY vocal booth using special sound-absorbing blankets. The framing that holds up the blanket is made from standard PVC pipe and connectors.
The total cost of the materials for this vocal booth will be around $350 to $400.
Here are the parts needed for this DIY project:
- 4 – Acoustic Blankets →
- 14 – One-Inch T-Joints →
- 8 – One-Inch U-Joints →
- 24 – Shower Curtain Rings →
- 1 – PVC pipe cutter →
- 4 – Clamps →
- ~ 6 – Four-foot length, one-inch diameter PVC pipe →
- 13 – Five-foot length, one-inch diameter PVC pipe →
For those who are a bit more ambitious, here is a video that shows how to build a home sound booth for around $500, out of lumber and sound-absorbent acoustic foam tiles.
For this booth, complete building instructions with diagrams and a materials list are found on the website of Murrant.ca.
Best For: People who are a hands-on type of person who likes to build things and those on a limited budget who need to create a working sound booth for as little money as possible.
5. Rent a Professional Voice-Over Studio
Professional recording studios rent for $50 to $500 per hour. The hourly rate includes the cost of an audio engineer to run the recording equipment and you will have to bring your recording media or buy it from the studio. Search on Yelp to find recording studios in your area.
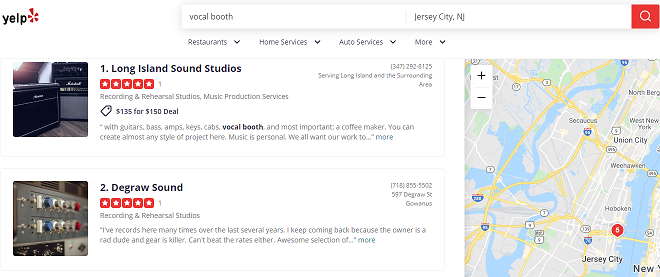
For example, I searched on Yelp for the “Best vocal booth in Jersey City, NJ” and found these studios listed:
- Long Island Sound Studios
- Degraw Sound
- Lessons & Sessions
- Brewery Recording Studio
- Skyroom Studio
There were many other choices. Any one of them would be a reasonable place to record a voice-over, if you can afford their hourly rental rates. To find some voice-over recording studios in your area, just search on Yelp for “best vocal booth” along with the name of your city.
Recording voice-overs requires less technical skill and microphone placement work than what is needed for an audio engineer to record a band. You may get a better rate if you find a recording studio that specializes in voice-overs. The rental rate may be less for a small vocal booth when compared to renting out a full sound recording studio room Many recording studios have rooms with enough space for a full band and have a smaller vocal booth within the space. When doing voice-overs, you do not need such a large room.
Sometimes, recording studios offer a “block-rate” discounted deal when you pay for a group of hours in advance. Other studios may offer discounts for last-minute bookings of time that is not scheduled. You may get a discount if you can go to the studio in a short moment’s notice. You may be able to find a deal like these if you shop around.
If you just want to try some voice-over recording with rented gear, you can rent equipment for recording, a microphone, and there is also the chance to rent out some vocal booths from the companies that sell them. Vocal Booths to Go rents out booths for $150 to $600 per week that depends on the type and the size, plus shipping charges. Many conferences and conventions, which need a temporary room for audio interviews at the event, use this solution.
You may be able to record your voice-overs at a local community college if they have a music program. Rehearsal rooms at schools are a decent alternative if you cannot afford the cost of a voice booth in a professional recording studio. You can bring some sound-absorbing material with you and temporarily hang it up in a rehearsal room at school to improve the voice recording.
Another idea to save money is to use moving blankets that you can rent from a self-moving or storage place. They are a very cheap substitute for professional acoustic blankets because they are made of similar materials.
Conclusion
If you’re not planning on renting some time at a professional recording studio, you can use any of the techniques I described above to buy or build a vocal booth. After you solve the challenge of having a place to record your voice-overs, you are also going to need some voice-over equipment to use to make the recordings.
Then, add a high-quality microphone that has a good design for recording voice-overs in a home recording studio setting. After that, you should be all set and ready to record everything from voice overs on Google Slides to YouTube video narration and more.
Conduct a few test recordings in your new room and then add more sound-absorbing material if needed. Make adjustments until you get a recorded sound that has a very high degree of presence for the voice. You want to capture a strong, clear sound with no reflective sound from the walls or natural reverb from the room where you are making the recording.
The goal is to make the voice-over recording very present without it sounding like it was recorded in a specific type of room. You don’t want it to sound like it was recorded in a small stuffy space either. The idea is, that the sound of the voice is all you hear. There is no distraction and there is no indication of what type of room it was recorded in at all.
When you do this well, the voice has that presence, which gives it a dynamic sense of power, and you can hear the difference.
Want to learn more about the art of voice work? Check out our guide to the top voice acting classes online.

